



7 Tips for Choosing the Right Center Outlet Drain
Choosing the right Center Outlet Drain can prevent standing water, unpleasant odors, and expensive bathroom repairs. The decision involves more than selecting a stylish grate. Floor slope, pipe size, waterproofing, cleaning access, and installation depth all affect long-term performance.
A reliable choice begins with the room itself. Measure the shower area carefully, then inspect the existing waste pipe and floor structure. A drain may look suitable online, yet fail when its outlet does not align with the pipe below. Pay attention to drainage capacity, grate strength, corrosion resistance, and compatibility with the waterproofing system. Manufacturer instructions matter. Local plumbing requirements matter too.
Small details can cause large problems.
These seven practical tips focus on the issues professionals check before installation. They explain how to compare outlet positions, materials, flow rates, adjustable height, maintenance features, and overall value. A stainless steel grate may resist rust, but poor installation can still cause leaks. A low-cost model may appear attractive, but replacement parts might be difficult to find later. That is where careful judgment becomes important.
There is no universal best drain. The right model depends on your floor design, shower size, plumbing layout, and maintenance habits. Even experienced installers can overlook one measurement. Recheck everything before cutting the floor. With clear specifications and realistic expectations, a Center Outlet Drain can provide dependable drainage and a cleaner, more comfortable shower space for years.
Understanding Center Outlet Drain Types and Compatibility
7 Tips for Choosing the Right Center Outlet Drain
Understanding Center Outlet Drain Types and Compatibility
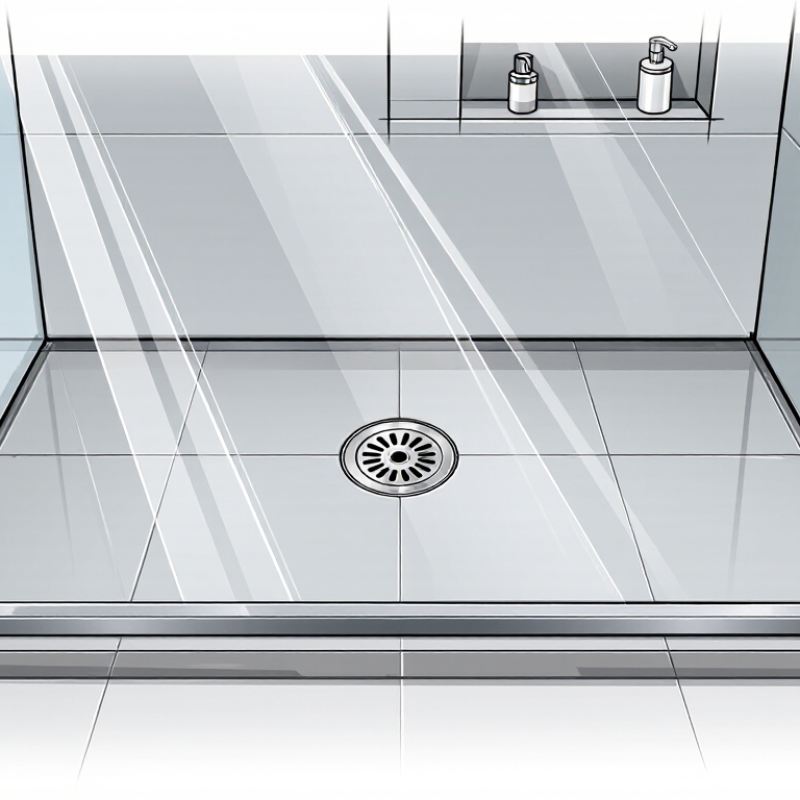
A center outlet drain sits near the shower’s midpoint, allowing water to flow from several directions. Point drains suit square or rectangular shower floors with four sloped planes. Linear drains usually need one continuous slope, although some models use a center outlet beneath a longer channel. That detail matters. The visible grate is only one part of the system.
Drain compatibility starts below the tile. Check the outlet diameter, trap location, waterproofing method, and finished floor height. Many residential shower systems use a 2-inch drain connection, but local plumbing requirements can differ. The drain must also match the membrane flange and tile thickness. A mismatch may create a raised grate, a weak seal, or hidden leaks. Small errors become expensive.
The U.S. Environmental Protection Agency’s WaterSense criteria limit labeled showerheads to 2.0 gallons per minute, compared with the federal 2.5-gallon limit. Drain capacity still depends on pipe slope, blockage, and installation quality. Do not assume a larger grate guarantees faster drainage. The National Kitchen and Bath Association’s recent bathroom trend reporting also shows continued interest in curbless showers, which demand accurate floor planning and waterproof transitions. Measure twice. Then check the trap position.
One practical warning: a center outlet can look ideal on paper but fail when joists block the pipe route. I would recheck the outlet location before ordering tile or cutting the subfloor. Sometimes the least attractive option installs more reliably.
7 Tips for Choosing the Right Center Outlet Drain - Understanding Center Outlet Drain Types and Compatibility
| Tip | Selection Dimension | Common Options | Compatibility Check | Practical Recommendation |
|---|---|---|---|---|
| 1 | Drain Type | Point drain with a centered outlet; square or round grate; adjustable or fixed-height body | Confirm that the drain body matches the planned shower base, mortar bed, or tiled floor assembly. | Use a point drain when the floor can be sloped from all sides toward one central outlet. |
| 2 | Outlet Size and Connection | Common residential outlet diameters include approximately 40 mm, 50 mm, and 75 mm, depending on local standards and application. | Match the drain outlet to the waste pipe diameter and connection method, such as solvent-weld, compression, or mechanical coupling. | Measure the existing pipe before ordering; do not rely only on the visible grate size. |
| 3 | Waterproofing Method | Topical sheet membrane, liquid-applied membrane, or traditional liner installed below the mortar bed | The drain must include the correct bonding flange, clamping ring, or membrane connection required by the waterproofing system. | Select the drain and waterproofing system as a matched assembly to reduce leakage risk. |
| 4 | Drainage Capacity | Capacity varies by outlet diameter, grate opening, trap arrangement, and local plumbing requirements. | Check the tested flow rate and compare it with the shower valve, tub filler, or other fixtures discharging to the drain. | Choose a drain with adequate tested flow capacity rather than selecting by appearance alone. |
| 5 | Grate and Finish | Stainless steel, coated metal, or polymer grate; removable or fixed grate; several surface finishes | Verify that the grate frame fits the drain body and that the finish is suitable for continuous wet-area exposure. | Prefer a removable grate for routine cleaning and hair or debris removal. |
| 6 | Installation Height and Floor Slope | Fixed-height drains; adjustable collars; height-adjustable grate assemblies | Allow sufficient adjustment for the tile, adhesive, mortar, and substrate thickness. Shower floors commonly require a continuous fall toward the drain; local codes determine the exact slope. | Choose an adjustable model when the finished floor height cannot be established accurately in advance. |
| 7 | Trap, Access, and Maintenance | Standard waste trap below the drain; removable hair strainer; cleanout access where permitted | Confirm trap depth, available structural space, ventilation requirements, and access for cleaning under applicable plumbing codes. | Plan the trap and pipe route before setting the drain body, especially in concrete or low-profile floor assemblies. |

Measuring the Shower Floor and Drain Opening Correctly
Choosing the right center outlet drain begins with accurate measurements. Measure from the finished wall surfaces, not the bare framing. Record the shower floor length and width at several points, because walls are rarely perfectly square. Mark the exact center point where the drain should sit.
Tip 1: Measure twice. Measure the drain opening at its widest point, then check its shape and depth. A round opening may look standard, but small differences can affect the fit. Also measure the pipe diameter below the floor. Do not rely on appearance. A ruler and a simple sketch can prevent an expensive correction.
The finished tile level matters too. Check the distance from the subfloor to the top of the drain grate. Include the waterproofing layer, mortar, tile, and adhesive. Tip 2: Keep the drain grate level with the finished floor. A low grate can collect water, while a high grate creates an uncomfortable edge. The floor should slope evenly toward the center outlet, usually according to local plumbing requirements and the installer’s specifications.
Tip 3: Test the position before sealing anything. Place the drain body and grate temporarily, then inspect the surrounding slope. I once measured from an unfinished wall and lost several millimeters after tiling. It seemed minor. It was not. If the opening feels slightly off-center, pause and recheck every reference point. A qualified installer should verify the pipe connection, waterproofing, and final measurements before permanent installation.
Comparing Drain Materials, Finishes, and Durability
Choosing a center outlet drain starts beneath the visible surface. During bathroom site checks, I inspect the pipe slope, waterproofing, and floor strength. A drain can look excellent but still collect water around its edges. The outlet should match the pipe size and sit securely within the tile layout. Small height errors often create large puddles.
Material affects service life. Stainless steel resists rust and handles frequent cleaning well. A higher-grade steel performs better in humid or coastal rooms. Brass feels solid and tolerates heat, but its surface coating may wear over time. Plastic drain bodies are lightweight and cost-effective. However, they need careful installation and suitable cleaning products. Material alone does not guarantee durability.
Finish changes both appearance and maintenance. Brushed surfaces hide fingerprints and small scratches better than polished ones. Matte finishes look modern, yet soap residue can appear quickly. Dark coatings need gentle cleaning because abrasive pads may expose the metal underneath. I once underestimated how much hair could block a narrow grate. Removable covers make routine cleaning easier. Check the coating edges, drainage holes, and fasteners before purchase. A durable drain should remain stable under foot traffic, resist corrosion, and allow simple access when cleaning becomes necessary.
Checking Installation Requirements and Maintenance Access
Choosing a center outlet drain begins with the installation site, not the drain’s appearance. Measure the finished floor height, outlet location, pipe diameter, slope, and available clearance. The International Code Council’s 2024 International Plumbing Code requires drainage systems to remain accessible for inspection and servicing, although local amendments may differ. Verify them before ordering.
Tip 1: Draw the service zone.
Leave enough room to remove the grate, trap, and nearby fittings without breaking tile. A removable access panel can prevent expensive demolition later. Check whether the drain body fits between joists or around reinforcement. Small conflicts become costly after concrete cures.
Tip 2: Plan maintenance access.
Keep cleanouts reachable and avoid placing permanent cabinets directly above them. The U.S. Environmental Protection Agency reports that household leaks can waste nearly 1 trillion gallons of water annually in the United States. A blocked or leaking drain may be minor at first, but hidden moisture can damage subfloors and create unpleasant odors. Inspect the gasket, connection, and surrounding seal during routine cleaning.
Tip 3: Confirm cleaning tools can enter the outlet path.
Flexible cables and inspection cameras need practical clearance, not just theoretical access. In my experience, installers often measure the drain opening but overlook the trap location. That mistake deserves more attention. Record the final dimensions and photograph concealed connections before closing the wall or floor. Check the maintenance plan with the plumber, installer, and building owner.
Evaluating Safety, Water Flow, Cost, and Long-Term Value
7 Tips for Choosing the Right Center Outlet Drain
Evaluating Safety, Water Flow, Cost, and Long-Term Value
Choose a drain with a stable, slip-resistant cover. A loose grate can shift under wet feet. Check its load rating and surface finish before installation. Confirm the drain matches local plumbing requirements. A certified installer can also identify weak connections or poor floor slope. I once saw a drain that looked attractive but held water around its edges. Appearance was not enough.
Measure the outlet size and inspect the pipe route. A wider outlet may improve flow, but only when the surrounding slope supports it. Test the drain with several buckets of water. Watch for slow movement, bubbling, or standing water. Removable components make hair and grit easier to clear. This detail saves time later. Do not ignore odor control. A suitable trap or sealing design helps block unpleasant smells from the pipe.
Compare the purchase price with installation, cleaning, and replacement costs. A cheaper drain may require frequent servicing or difficult tile removal. Stainless or corrosion-resistant materials often offer better value in damp areas. Still, expensive materials do not fix poor installation. Ask how the cover, trap, and seals can be replaced. Keep access practical. My own preference has changed after seeing maintenance become unnecessarily disruptive. Leave room for future inspection, even if the current layout seems perfect.
Article Source:

Whether your solution requires a single pumping application or an expansive engineered system,
CheckPoint is committed to becoming your partner in excellence.


