



How to Install a 180 Degree Concealed Hinge?
A 180 Degree Concealed Hinge can let a cabinet door swing wide while keeping the hinge hidden when the door is closed. That wider opening is useful beside pull-out storage, appliance panels, or cabinets that need clear access. But the result depends on more than the hinge itself. Door thickness, overlay, cup-hole position, and frame clearance all matter. Small errors matter.
Industry reports help explain why careful cabinet planning is practical. Houzz’s 2024 U.S. Kitchen Trends Study tracks cabinet and storage choices in renovation projects, while the National Kitchen & Bath Association’s 2024 Kitchen Trends Report surveys professionals about changing kitchen priorities. Neither report is an installation manual. They do, however, show why accurate fit and useful access deserve attention in modern cabinetry. For technical decisions, follow the hinge maker’s current specifications; models with similar opening angles may require different drilling patterns or clearances.
This guide explains how to install and adjust a 180 Degree Concealed Hinge, from marking the cup hole to checking the door swing. You will need careful measurements, suitable bits, and a steady hand. A test fit is worth the extra minute. In practice, I would not assume an old hinge position is correct just because it looks close. That shortcut can leave the door rubbing, uneven, or unable to open fully. Manufacturers’ installation sheets should remain the final reference for model-specific dimensions.
Understanding 180-Degree Concealed Hinges and Installation Requirements
A 180-degree concealed hinge lets a door swing clear of the cabinet opening, but the angle alone does not guarantee a fit. Check the hinge’s technical drawing for cup diameter, drilling depth, mounting-plate position, and required door thickness. Measure the door and frame, too. A small error can leave the edge rubbing or the door sitting proud. The 2024 U.S. Kitchen Trends Study reported that 76% of renovating homeowners upgraded their cabinets, showing how common cabinet replacement is; it does not, however, specify hinge dimensions or compatibility.
Use the hardware maker’s installation sheet and verify performance claims against ANSI/BHMA A156.9, which sets test requirements for cabinet hardware. Confirm that the specified hinge supports the door’s weight and dimensions, and check whether the mounting surface can hold the screws securely. Mark the cup center with a square, drill to the stated depth, and test the swing before installing every hinge. Keep the door supported while fastening it. Easy to overlook. I would recheck the clearances with the door open fully; real cabinets are not always perfectly square, and that can change the result.

Gathering Tools and Preparing the Door and Cabinet
Before fitting a 180-degree concealed hinge, gather a tape measure, combination square, pencil, clamps, drill, and the correct boring bit. Keep the hinge’s installation sheet nearby. Cup diameter and depth vary, so do not assume every hinge uses the same dimensions. A square-edged door and a stable work surface make accurate marking easier. Small details matter.
Prepare the door and cabinet before drilling. Remove old hardware, then check both panels for cracks, loose joints, and uneven edges. Measure the door thickness and cabinet opening, and confirm the hinge allows the door to clear adjacent handles or walls through its full swing. The USDA Forest Products Laboratory’s Wood Handbook reports equilibrium moisture contents of about 6.9% at 70°F and 35% relative humidity, and 9.2% at 50% humidity. Wood can shift with indoor conditions, so avoid drilling into damp or visibly warped stock. Mark the hinge centerlines with a square, clamp the door securely, and test the layout on scrap wood if available.
Tips: Use the hinge template, but verify its marks against the actual hinge. Set a depth stop before boring the cup hole. A rushed mark is easy to miss; checking twice is less frustrating than patching a misplaced hole. Keep the drill perpendicular, and wear eye protection while cutting.
| Category | Tool or Check | Preparation Guidance | Why It Matters |
|---|---|---|---|
| Safety | Safety glasses and hearing protection | Wear eye protection while drilling; use hearing protection when operating a power drill for extended periods. | Helps protect against flying chips, dust, and drilling noise. |
| Measuring and marking | Tape measure, pencil, and combination square | Mark the hinge locations from a consistent reference edge and check that the marks are square to the door edge. | Consistent, square marks help keep the door aligned and reduce uneven gaps. |
| Drilling | Drill, suitable bit, and depth stop | Use the cup-hole diameter and depth specified for the selected hinge. A 35 mm cup is common, but it is not universal; confirm the hinge instructions before drilling. | The correct hole size and controlled depth help prevent a loose fit or drilling through the door face. |
| Holding and fastening | Clamps and a screwdriver or adjustable driver | Secure the workpiece before drilling, and use the screw type and size supplied or specified for the hinge and cabinet material. | A stable workpiece improves accuracy; suitable screws help avoid stripped holes or damaged panels. |
| Hinge specification | Hinge instructions or drilling template | Confirm the hinge’s required cup diameter, cup depth, edge distance, mounting-plate position, and opening clearance before marking the door. | Dimensions and clearances vary by hinge design, door thickness, and cabinet layout. |
| Door preparation | Door inspection and layout | Check that the door is flat and undamaged. Mark the hinge positions using the hinge template and confirm the door’s thickness is within the hinge’s stated range. | A sound, correctly marked door provides a reliable base for the hinge cups. |
| Cabinet preparation | Cabinet-side inspection and layout | Check that the cabinet side is secure and reasonably square. Identify the mounting-plate positions and make sure they do not overlap shelves, fittings, or damaged material. | Secure, unobstructed mounting areas support the hinge and allow adjustment. |
| Opening clearance | Dry-fit and clearance check | Before drilling, check the hinge’s stated 180-degree opening conditions and confirm nearby walls, handles, adjacent doors, and cabinet features will not obstruct movement. | The achievable opening angle depends on the hinge, mounting arrangement, and surrounding space. |
Marking and Cutting the Hinge Recesses
Accurate recesses start with the hinge’s technical drawing, not a guess. Mark the hinge centerline from a consistent door edge, then transfer it to the cabinet side with a square. Check both marks before cutting. A small error can leave the door rubbing or unevenly spaced. The USDA Forest Products Laboratory’s Wood Handbook reports typical green-to-oven-dry shrinkage of about 6–12% tangentially and 3–6% radially for many wood species. Solid-wood doors can move across the grain, so avoid placing a recess too close to a thin edge. Different materials behave differently.
Tips: Clamp a drilling guide or router template firmly. Score the outline with a sharp knife to reduce chipped veneer. Set the cutting depth to the hinge specification, and remove material in shallow passes. Test the hinge in the recess before drilling pilot holes. It should sit flush, not rock. A neat cut can still be misplaced; recheck the centerline before committing to the second door.
Mounting the Hinges and Attaching the Door
Mounting the hinges and attaching the door takes patience; a few millimetres can affect the reveal. Harvard’s Joint Center for Housing Studies forecast in its July 2023 Leading Indicator of Remodeling Activity that annual homeowner improvement and repair spending would reach about $485 billion by the second quarter of 2024. That is broad remodeling data, not hinge-specific guidance, but it reflects the scale of projects where careful cabinet fitting matters.
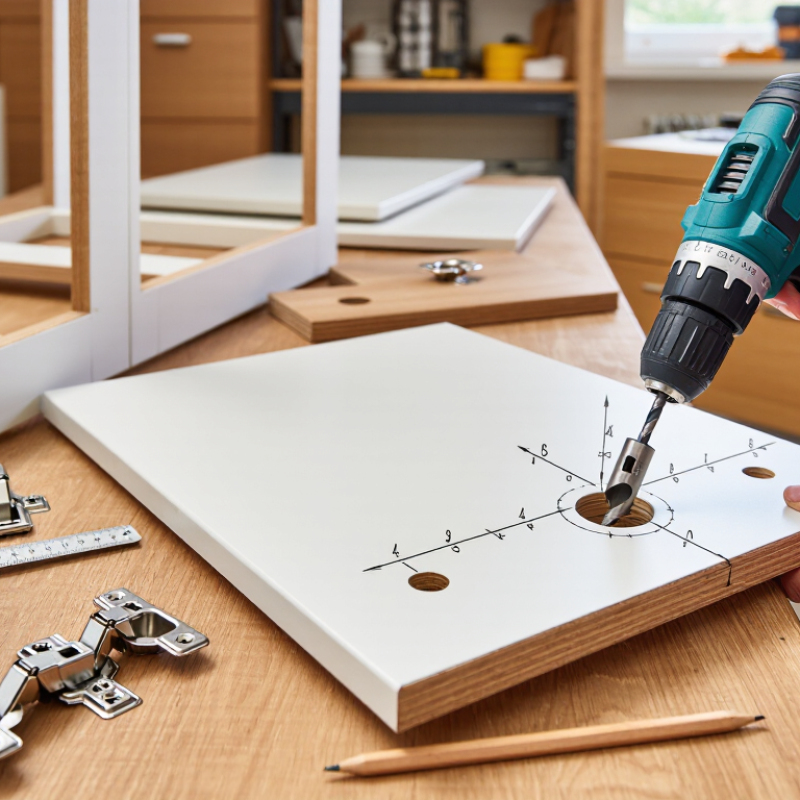
Mark the hinge-cup centers from the supplied template, then drill to the specified depth with a stop collar. Keep the drill square. Clamp the door on a padded, level surface, and clear away sawdust before seating each cup. Attach the mounting plates to the cabinet, using pilot holes to reduce splitting. Start with screws snug, not fully tight. I still check twice.
With a helper supporting the door, engage the hinge arms with their plates and secure them. Open the door slowly, checking that it clears adjacent doors and drawers through its full 180-degree swing. Adjust height, depth, and side position in small increments. Don’t force a stiff mechanism; stop and inspect the plate alignment and screw seating. A slightly uneven reveal can be hard to notice until the door moves. Recheck it.
Adjusting Alignment and Testing the Full Opening Range
How to Install a 180 Degree Concealed Hinge?
Adjusting Alignment and Testing the Full Opening Range
After mounting the hinge, support the door and adjust its side, height, and depth screws in small increments. Aim for a consistent 2–3 mm reveal, unless the cabinet design specifies otherwise. Check the gap at the top, bottom, and latch edge; a door can look straight while still rubbing near one corner. Small moves matter. It is easy to overcorrect.
Open the door slowly and watch the hinge arm, cabinet edge, and nearby handles through the full sweep. A nominal 180-degree opening depends on clearances, so do not force the door against a wall or adjacent panel. ANSI/BHMA A156.9-2020 sets performance-test requirements for cabinet hardware, including endurance and functional performance; repeated, controlled opening is more informative than one smooth swing. After several test cycles, check for screw movement, sag, scraping, or a changing reveal. If contact appears near full extension, adjust the cabinet clearance or hinge position rather than pushing harder. That part is easy to miss. Recheck alignment with the door carrying its normal weight.
Article Source:

Whether your solution requires a single pumping application or an expansive engineered system,
CheckPoint is committed to becoming your partner in excellence.


